For various reasons I'm shutting down this Blogspot site, and redirecting traffic back to my personal web site. I've got a new post there explaining this in more detail.
Wednesday, December 28, 2022

Wednesday, March 13, 2019
Using LTE for Out of Band
It's generally good practice to make sure that any network you're responsible for maintaining can be reached in the event of a failure of either the main Internet (transit) connection, or failure (or misconfiguration) of the routing equipment. Sometimes it's not feasible to have a second transit connection or redundant networking hardware, and so you need to get creative.
One of my clients is a not-for-profit with constrained financial resources. We wanted to have a way in to the network in the event of a failure of the main router, or in case someone (likely me) fat-fingers something and breaks the router config. And, while having a second transit connection would be nice, it's just not something we can fit in the budget at the moment.
So, we had to get creative.
Before I came on board, they had purchased a consumer-grade LTE modem with the intention of using that as the backup access into the network, but hadn't actually set it up yet. This blog post covers the steps I took to get it working.
The modem's LAN port is connected directly to an ethernet port on HOST_A. We could also have run that connection through a VLAN on our switches, but since the router and the server are in the same cabinet that would only serve to increase the possible ways this could fail, while providing no benefit. The main point here is that the router is going to provide its own network, so it's best not to have it on the same physical network (or VLAN) with other traffic.
This modem is designed to be able to take over in the event of the failure of a terrestrial network, which is what the WAN port is used for. But we don't want to use that here, so that port is left empty.
Connect to the modem's web interface (for this model, the default IP address and password are printed on the back).
In the Settings:Mobile tab, take a look a the APN details. This probably defaults to IPv4 only, so if you want to try to get IPv6 working (more on that later) you'll have to update the PDP and PDP Roaming configuration here. In the Advanced tab, you want to put the modem into Bridge mode (which will also disable the DHCP server), and you may want to give it a different static address. The modem's default network overlaps with private address space we already use, so I'm going to use 172.16.0.0/30 as an example point-to-point network to communicate with the modem. For that, you'd set the modem's IP address to 172.16.0.1 and its netmask to 255.255.255.252. Once you submit the configuration changes, the modem should restart.
You'll also need to modify /etc/dhcp/dhclient.conf to disable some of the changes that it normally makes to the system. The default request sent by the Debian dhclient includes the following options:
I've modified ours to remove the routers, domain-name, domain-name-servers, domain-search, dhcp6.name-servers, dhcp6.domain-search, dhcp6.fqdn, and dhcp6.sntp-servers options. You also need to block changes to /etc/resolv.conf. Even though you've told dhclient not to request those options, the server may still supply them and dhclient will happily apply them unless you explicitly tell it not to.
We're going to use SSH to set up the tunnel, but we need something to maintain the tunnel in the event it drops for some reason. There is a handy programme called autossh which does the job well. In addition to setting up the tunnel we need for access to HOST_A, it will also set up an additional tunnel that it uses to echo data back and forth between HOST_A and HOST_B to monitor its own connectivity, and restart the tunnel if necessary. We can combine that monitor with SSH's own ServerAliveInterval and ServerAliveCountMax settings to be pretty sure that the tunnel will be up unless there's a serious problem with the LTE network or modem.
I've chosen to run autossh from cron on every reboot, so I created an /etc/cron.d/ssh-tunnel file on HOST_A that looks like this:
The -f option backgrounds autossh. -M 20000 sets up a listening port at HOST_B:20000 which sends data back to HOST_A:20001 for autossh to use to monitor the connection. You can explicitly specify the HOST_A port as well, if you prefer. The remaining options are standard ssh options which autossh passes on. Note that in my case HOST_B has an IPv6 address, but I haven't configured the tunnel interface for IPv6, so I'm forcing ssh to use IPv4.
You may need to modify the sshd_config on HOST_B to set GatewayPorts yes, depending on the default configuration. Otherwise you won't get a remotely accessible port on HOST_B.
Instead of using cron, you could also use something like supervisord or systemd to start (and re-start if necessary) the autossh process.
I have also tried using DHCPv6 (iface eth3:0 inet6 dhcp, above) but that also fails to get the configuration I want, and also causes ifup to return a fail condition when configuring the interface. At least the above SLAAC problem has the feature of failing silently, so I can leave the configuration in place without causing problems with interface management.
Perhaps you can find the right combination of options to make it work! I invite you to follow up, if you do.
Good luck!
One of my clients is a not-for-profit with constrained financial resources. We wanted to have a way in to the network in the event of a failure of the main router, or in case someone (likely me) fat-fingers something and breaks the router config. And, while having a second transit connection would be nice, it's just not something we can fit in the budget at the moment.
So, we had to get creative.
Before I came on board, they had purchased a consumer-grade LTE modem with the intention of using that as the backup access into the network, but hadn't actually set it up yet. This blog post covers the steps I took to get it working.
Overview
The data centre in question is in the US, so we're using a simple T-mobile pay-as-you-go data service. This service is designed for outgoing connections, and doesn't provide a publicly-reachable IP address that I could ssh to from outside the LTE network, so I need to set up some sort of tunnel to give me an endpoint on the Internet I can connect to that gets leads inside the client's network. ssh itself is the obvious choice to set up that tunnel.
I've set the tunnel up to provide access to one of the client's administrative hosts, which has serial access to about half the network equipment (including the main router). From that vantage point I should be able to fix most configuration issues that would prevent me from accessing the network through the normal transit connection, and can troubleshoot upstream transit problems as if I were standing there in the data centre.
The modem can be put into bridge mode, but can still have an IP address to manage its configuration. The LTE network wants to use DHCP to give our server an address. So, we'll have the slightly unusual configuration of having both a static and DHCP address on the server interface that the modem is connected to. The server has other duties though, so we'll have to make sure that things like the default route and DNS configuration aren't overwritten; that requires some extra changes to the DHCP client config.
And finally, for the tunnel to work we need a host somewhere out on the Internet that we can still reach when the 'home' network goes down. In the rest of this post I'm going to refer to our local administrative host as HOST_A and the remote host we're using for a tunnel endpoint as HOST_B. We'll need some static routes on HOST_A that send all traffic for HOST_B through the LTE network, and then we can construct the ssh tunnel which we'll use to proxy back into HOST_A.
I've set the tunnel up to provide access to one of the client's administrative hosts, which has serial access to about half the network equipment (including the main router). From that vantage point I should be able to fix most configuration issues that would prevent me from accessing the network through the normal transit connection, and can troubleshoot upstream transit problems as if I were standing there in the data centre.
The modem can be put into bridge mode, but can still have an IP address to manage its configuration. The LTE network wants to use DHCP to give our server an address. So, we'll have the slightly unusual configuration of having both a static and DHCP address on the server interface that the modem is connected to. The server has other duties though, so we'll have to make sure that things like the default route and DNS configuration aren't overwritten; that requires some extra changes to the DHCP client config.
And finally, for the tunnel to work we need a host somewhere out on the Internet that we can still reach when the 'home' network goes down. In the rest of this post I'm going to refer to our local administrative host as HOST_A and the remote host we're using for a tunnel endpoint as HOST_B. We'll need some static routes on HOST_A that send all traffic for HOST_B through the LTE network, and then we can construct the ssh tunnel which we'll use to proxy back into HOST_A.
Setting up the Modem
The modem we're using is a Netgear LB2120 LTE Modem with an external antenna, to get around any potential interference from the cabinet itself, or the computer equipment and wiring inside. We have pretty good reception (4-5 bars) from just placing the antenna on top of the cabinet.The modem's LAN port is connected directly to an ethernet port on HOST_A. We could also have run that connection through a VLAN on our switches, but since the router and the server are in the same cabinet that would only serve to increase the possible ways this could fail, while providing no benefit. The main point here is that the router is going to provide its own network, so it's best not to have it on the same physical network (or VLAN) with other traffic.
This modem is designed to be able to take over in the event of the failure of a terrestrial network, which is what the WAN port is used for. But we don't want to use that here, so that port is left empty.
Connect to the modem's web interface (for this model, the default IP address and password are printed on the back).
In the Settings:Mobile tab, take a look a the APN details. This probably defaults to IPv4 only, so if you want to try to get IPv6 working (more on that later) you'll have to update the PDP and PDP Roaming configuration here. In the Advanced tab, you want to put the modem into Bridge mode (which will also disable the DHCP server), and you may want to give it a different static address. The modem's default network overlaps with private address space we already use, so I'm going to use 172.16.0.0/30 as an example point-to-point network to communicate with the modem. For that, you'd set the modem's IP address to 172.16.0.1 and its netmask to 255.255.255.252. Once you submit the configuration changes, the modem should restart.
Setting up the Server
The server needs to have a static IP address on the point-to-point network for configuring the modem as well as a DHCP address assigned by the LTE network. Because we may want to bring these up and down separately, I suggest putting the DHCP address on a virtual interface. You also need to configure a static route on the DHCP-assigned interface that points to HOST_B, so that any outbound traffic from HOST_A to HOST_B goes across the LTE network instead of using your normal Internet links. On a Debian host, /etc/network/interfaces.d/LTE.conf might look something like this:auto eth3 iface eth3 inet static address 172.16.0.2/30 auto eth3:0 iface eth3:0 inet dhcp post-up ip route add 192.0.2.1/32 dev eth3:0 post-down ip route del 192.0.2.1/32 dev eth3:0
You'll also need to modify /etc/dhcp/dhclient.conf to disable some of the changes that it normally makes to the system. The default request sent by the Debian dhclient includes the following options:
request subnet-mask, broadcast-address, time-offset, routers,
   domain-name, domain-name-servers, domain-search, host-name,
   dhcp6.name-servers, dhcp6.domain-search, dhcp6.fqdn, dhcp6.sntp-servers,
   netbios-name-servers, netbios-scope, interface-mtu,
   rfc3442-classless-static-routes, ntp-servers;
I've modified ours to remove the routers, domain-name, domain-name-servers, domain-search, dhcp6.name-servers, dhcp6.domain-search, dhcp6.fqdn, and dhcp6.sntp-servers options. You also need to block changes to /etc/resolv.conf. Even though you've told dhclient not to request those options, the server may still supply them and dhclient will happily apply them unless you explicitly tell it not to.
request subnet-mask, broadcast-address, time-offset, host-name,
    netbios-name-servers, netbios-scope, interface-mtu,
    rfc3442-classless-static-routes;

supersede domain-name "example.net";
supersede domain-name-servers 198.51.100.1, 198.51.100.2;
Setting up the Tunnel
For this, you want to create an unprivileged user that doesn't have access to anything sensitive. For the purposes of this post I'll call the user 'workhorse'. Set up the workhorse user on both hosts; generate an SSH key without a passphrase for that user on HOST_A, and put the public half in the workhorse user's authorized_keys file on HOST_B.We're going to use SSH to set up the tunnel, but we need something to maintain the tunnel in the event it drops for some reason. There is a handy programme called autossh which does the job well. In addition to setting up the tunnel we need for access to HOST_A, it will also set up an additional tunnel that it uses to echo data back and forth between HOST_A and HOST_B to monitor its own connectivity, and restart the tunnel if necessary. We can combine that monitor with SSH's own ServerAliveInterval and ServerAliveCountMax settings to be pretty sure that the tunnel will be up unless there's a serious problem with the LTE network or modem.
I've chosen to run autossh from cron on every reboot, so I created an /etc/cron.d/ssh-tunnel file on HOST_A that looks like this:
@reboot workhorse autossh -f -M 20000 -qN4 -o "ServerAliveInterval 60" -o "ServerAliveCountMax 3" -R '*:20022:localhost:22' HOST_B
The -f option backgrounds autossh. -M 20000 sets up a listening port at HOST_B:20000 which sends data back to HOST_A:20001 for autossh to use to monitor the connection. You can explicitly specify the HOST_A port as well, if you prefer. The remaining options are standard ssh options which autossh passes on. Note that in my case HOST_B has an IPv6 address, but I haven't configured the tunnel interface for IPv6, so I'm forcing ssh to use IPv4.
You may need to modify the sshd_config on HOST_B to set GatewayPorts yes, depending on the default configuration. Otherwise you won't get a remotely accessible port on HOST_B.
Instead of using cron, you could also use something like supervisord or systemd to start (and re-start if necessary) the autossh process.
Using the Setup
Once this is all put together, you should be able to ssh to port 20022 on HOST_B, and wind up with a shell on HOST_A.
matt@chani.conundrum.com:~
16:05:58 (3130) % ssh -p 20022 HOST_B
The authenticity of host '[HOST_B]:20022 ([192.0.2.1]:20022)' can't be established.
ECDSA key fingerprint is SHA256:4v+NbLg2QYqe43WFR9QKXaVwCpcc71u5jJmxJdZVITQ.
Are you sure you want to continue connecting (yes/no)? yes
Warning: Permanently added '[HOST_B]:20022,[192.0.2.1]:20022' (ECDSA) to the list of known hosts.
Linux HOST_A 4.9.0-6-amd64 x86_64 GNU/Linux

The programs included with the Debian GNU/Linux system are free software;
the exact distribution terms for each program are described in the
individual files in /usr/share/doc/*/copyright.

Debian GNU/Linux comes with ABSOLUTELY NO WARRANTY, to the extent
permitted by applicable law.
Last login: Wed Mar 13 18:02:09 2019 from 216.235.10.40

matt@HOST_A:~
20:05:59 (618) %
Why no IPv6?
T-Mobile support IPv6 on their LTE networks, so I have the APN for our modem set to IPV4V6 PDP. The server configuration has been a problem, however.
As with IPv4, we don't want to get a default route for our LTE network because that would interfere with the normal traffic of the server. It seems like disabling the acceptance of Router Advertisement (RA) messages should be all that's necessary, but for some reason that entirely disables SLAAC address assignment.
% cat /etc/network/interfaces.d/LTE.conf

auto eth3
iface eth3 inet static
 address 172.16.0.2/30

auto eth3:0
iface eth3:0 inet dhcp
 post-up ip route add 192.0.2.1/32 dev eth3:0
 post-down ip route del 192.0.2.1/32 dev eth3:0

iface eth3:0 inet6 auto
 pre-up /sbin/sysctl -w net.ipv6.conf.eth3.accept_ra=0
 post-up ip route add 2001:db8::1//128 dev eth3:0
 post-down ip route del 2001:db8::1/128 dev eth3:0
I have also tried using DHCPv6 (iface eth3:0 inet6 dhcp, above) but that also fails to get the configuration I want, and also causes ifup to return a fail condition when configuring the interface. At least the above SLAAC problem has the feature of failing silently, so I can leave the configuration in place without causing problems with interface management.
Perhaps you can find the right combination of options to make it work! I invite you to follow up, if you do.
Good luck!
Monday, July 10, 2017
The .io Error: A Problem With Bad Optics, But Little Substance
EDIT: There are several comments on this post (and sent to me privately) which correctly note that I've overlooked an important variation in the behaviour of recursive servers, that would affect the ability of this hijack to succeed. I'm leaving the post up as-is because I think it demonstrates just how complicated the DNS is, and just how easy it is for anyone (even someone who knows it inside and out) to miss something important.
Original article below the jump...
Original article below the jump...
Saturday, February 27, 2016
Installing FreeNAS 9.3 Over the Network
As users of new Skylake (LGA1151) systems are discovering, Intel has completely removed EHCI support from the new architecture. XHCI (USB 3.0) is supposed to be completely backwards compatible to USB 2.0, but the lack of EHCI support has some less than pleasant effects on trying to boot from USB using any OS that is expecting USB 2.0 support. Specifically, this means that GRUB 2 cannot currently boot an OS on XHCI-only systems, which makes installing FreeNAS a bit of a pain.
The symptom of this problem is that on XHCI systems the boot process will proceed up to the point where it tries to mount the root filesystem, and then it will die with an "error 19".
This is actually a problem that affects all XHCI systems, but if your system supports both EHCI and XHCI, you can disable XHCI in the BIOS to make USB booting work. Skylake systems, however, have no EHCI support at all, not even on the USB 2.0 motherboard headers, so this workaround isn't available.
Some people have found success with PCI cards that add EHCI USB ports, but you have to use caution with this approach since many (most?) PCI USB cards don't provide bootable USB ports. I didn't want to have to go pick up extra hardware just to install the OS, so I've opted for another approach: load the installer over the network via PXE.
The FreeNAS developers use PXE booting when testing new builds, and there is a guide for doing this with FreeNAS 9.2. However, the guide is two years old and I found it to be missing several steps when trying to apply it to a current version of FreeNAS. It's even worse when trying to use current versions of the FreeNAS developers' tools, as they're completely missing large sections of setup instruction (they're clearly not intended for use outside the project).
So, I'm publishing an update to the guide here. Eventually this will be out of date too, but hopefully it will save someone time down the road.
If you want to follow this guide you will need:
Good luck!
The symptom of this problem is that on XHCI systems the boot process will proceed up to the point where it tries to mount the root filesystem, and then it will die with an "error 19".
Trying to mount root from cd9660:/dev/iso9660/FreeNAS_INSTALL []...
mountroot: waiting for device /dev/iso9660/FreeNAS_INSTALL ...
Mounting from cd9660:/dev/iso9660/FreeNAS_INSTALL failed with error 19.
This is actually a problem that affects all XHCI systems, but if your system supports both EHCI and XHCI, you can disable XHCI in the BIOS to make USB booting work. Skylake systems, however, have no EHCI support at all, not even on the USB 2.0 motherboard headers, so this workaround isn't available.
Some people have found success with PCI cards that add EHCI USB ports, but you have to use caution with this approach since many (most?) PCI USB cards don't provide bootable USB ports. I didn't want to have to go pick up extra hardware just to install the OS, so I've opted for another approach: load the installer over the network via PXE.
The FreeNAS developers use PXE booting when testing new builds, and there is a guide for doing this with FreeNAS 9.2. However, the guide is two years old and I found it to be missing several steps when trying to apply it to a current version of FreeNAS. It's even worse when trying to use current versions of the FreeNAS developers' tools, as they're completely missing large sections of setup instruction (they're clearly not intended for use outside the project).
So, I'm publishing an update to the guide here. Eventually this will be out of date too, but hopefully it will save someone time down the road.
If you want to follow this guide you will need:
- a FreeBSD server which will be your PXE and DHCP server
- a machine you want to install FreeNAS on (presumably you already have this, since you're reading this guide)
Set up the BIOS
You'll want to modify your system BIOS boot order on the NAS host to make sure that PXE (or Network) boot is enabled, and will be attempted before any other valid boot option (e.g. if there's an OS on any disk in your system, that disk should be ordered after the PXE boot). Exactly how you do this is going to be specific to your BIOS.Setting up the DHCP Server
Install the isc-dhcp43-server package, and use a config file that looks mostly like the following. Update it for the subnet you use on your network: "next-server" should be the IP address of your PXE server.subnet 192.168.57.0 netmask 255.255.255.0 {
range 192.168.57.100 192.168.57.200;
option subnet-mask 255.255.255.0;
option routers 192.168.57.1;
option broadcast-address 192.168.67.255;
option domain-name-servers 192.168.57.1;
option domain-name "mydomain.com";
next-server 192.168.57.10;
filename "boot/pxeboot";
option root-path "/tftpboot/installer/";
}
Prepare the Installer
You need a copy of the FreeNAS installer ISO coped out onto the PXE server's filesystem. The following pair of commands will get the current version I'm using:mkdir -p /tftpboot/installer fetch -o - http://download.freenas.org/9.3.1/latest/x64/FreeNAS-9.3-STABLE-201602031011.iso | bsdtar -x -f - -C /tftpboot/installer/
Set up NFS
First, permit the installer you just set up to be exported, and start up NFS.echo '/tftpboot -ro -alldirs' >> /etc/exports echo 'nfs_server_enable="YES"' >> /etc/rc.conf service nfsd startNext, instruct the installer to mount its root filesystem from the NFS export you just setup. Be sure to set the hostname of your pxeserver (or its IP address) correctly in the fstab entry.
mkdir /tftpboot/installer/etc
echo 'pxeserver:/tftpboot/installer   /   nfs   ro   0 0' >> /tftpboot/installer/etc/fstab
Setting up TFTP
Modify the tftp lines in /etc/inetd.conf to look like the following:tftp dgram udp wait root /usr/libexec/tftpd tftpd -l -s /tftpboot/installer tftp dgram udp6 wait root /usr/libexec/tftpd tftpd -l -s /tftpboot/installerFinally, enable inetd and test your tftp server:
echo 'inetd_enable="YES"' >> /etc/rc.conf
service inetd start
tftp localhost
tftp> get boot/pxeboot
Received 231424 bytes during 0.0 seconds in 454 blocks
Boot!
That's it. You should now be able to boot the installer over the network, and install FreeNAS on a disk installed in your NAS server. Don't forget to consult the FreeBSD handbook section on diskless booting if you need help troubleshooting anything. After installing, you may need to alter the boot order again to ensure that your freshly installed OS is booted before PXE.Good luck!
Friday, October 11, 2013
Society's Bullies Hide Behind Secrecy
This week I had the privilege of being present at a discussion with Ladar Levison at a meeting of the North American Network Operators' Group (NANOG), his first public appearance since the court documents related to his fight with the FBI were made public.
For those not familiar with the case, Levison is the owner of Lavabit, a web-based email service designed to be secure against eavesdropping, even by himself. On August 8th this year he suddenly closed the service, posting an oblique message on the front page of the Lavabit website. The message explained only that he had closed the service because he had been left with a choice to "become complicit in crimes against the American people or walk away from nearly ten years of hard work by shutting down Lavabit."
There has been much speculation over the last couple of months that he had closed the service over a subpoena related to Edward Snowden's use of the service, and that an attached gag order similar to a National Security Letter (which were found to be unconstitutional in 2004) prevented him from speaking out about it.
Much of that speculation was confirmed last week when the courts unsealed the documents relating to Levison's appeal of a July 16th court order, which required him to turn over cryptographic keys that would allow the FBI to spy on all of the service's traffic, not just the information specific to Snowden's use of the service, which was specified in the original warrant. Wired Magazine published an article last week with most of the known details of the case, so I won't go into much more detail about that.
What I'd like to highlight is the danger to information security, consumer confidence, and the technological economy as a whole, should Levison lose his fight with the FBI. The keys being requested by the FBI would allow them access not only to all of the information related to the individual targeted by their warrant, but also every other customer's data, and the data of the business itself. This is highly reminiscent of recent revelations regarding the NSA and the scope of their data collection. If that sort of wide net is supported by the courts, the fight for any kind of personal privacy will be lost, and consumers will never be able to trust any company with ties to the United States with any data at all.
This isn't just a problem in the United States. Many of our online services eventually have dependencies on US companies. In Canada, a huge percentage of our network traffic crosses into the US in order to cross the continent rather than remaining in Canada when moving between cities. In other countries consumers rely on some of the more obvious US-based services (Facebook, Twitter, Google) but also many other services have less obvious dependencies, such as with services hosted by US-based data centres or on so-called "cloud" services with ties to the US.
As Andrew Sullivan comments during the Q&A, overreaching orders such as these are an attack on the network, as surely as any criminal trying to break a network's security. Our personal privacy and the security technologies that guarantee it face attacks by those who want easy access to everyone's information, under the pretence of protecting the very people whose privacy is being violated. It is vitally important that other business owners, like Levison, step up and fight orders such as these, so that a real public debate can happen over whether we still feel personal privacy and personal freedoms still trump the government's desire to have it easy.
At this point it is impossible to know whether any similar services have been compromised in the way the FBI has attempted with Lavabit. I applaud the principled stance Levison is taking against this intrusion, and hope that, should I ever be in a similar position, I would have the strength to endure the long fight necessary to see it through.
For those not familiar with the case, Levison is the owner of Lavabit, a web-based email service designed to be secure against eavesdropping, even by himself. On August 8th this year he suddenly closed the service, posting an oblique message on the front page of the Lavabit website. The message explained only that he had closed the service because he had been left with a choice to "become complicit in crimes against the American people or walk away from nearly ten years of hard work by shutting down Lavabit."
There has been much speculation over the last couple of months that he had closed the service over a subpoena related to Edward Snowden's use of the service, and that an attached gag order similar to a National Security Letter (which were found to be unconstitutional in 2004) prevented him from speaking out about it.
Much of that speculation was confirmed last week when the courts unsealed the documents relating to Levison's appeal of a July 16th court order, which required him to turn over cryptographic keys that would allow the FBI to spy on all of the service's traffic, not just the information specific to Snowden's use of the service, which was specified in the original warrant. Wired Magazine published an article last week with most of the known details of the case, so I won't go into much more detail about that.
What I'd like to highlight is the danger to information security, consumer confidence, and the technological economy as a whole, should Levison lose his fight with the FBI. The keys being requested by the FBI would allow them access not only to all of the information related to the individual targeted by their warrant, but also every other customer's data, and the data of the business itself. This is highly reminiscent of recent revelations regarding the NSA and the scope of their data collection. If that sort of wide net is supported by the courts, the fight for any kind of personal privacy will be lost, and consumers will never be able to trust any company with ties to the United States with any data at all.
This isn't just a problem in the United States. Many of our online services eventually have dependencies on US companies. In Canada, a huge percentage of our network traffic crosses into the US in order to cross the continent rather than remaining in Canada when moving between cities. In other countries consumers rely on some of the more obvious US-based services (Facebook, Twitter, Google) but also many other services have less obvious dependencies, such as with services hosted by US-based data centres or on so-called "cloud" services with ties to the US.
As Andrew Sullivan comments during the Q&A, overreaching orders such as these are an attack on the network, as surely as any criminal trying to break a network's security. Our personal privacy and the security technologies that guarantee it face attacks by those who want easy access to everyone's information, under the pretence of protecting the very people whose privacy is being violated. It is vitally important that other business owners, like Levison, step up and fight orders such as these, so that a real public debate can happen over whether we still feel personal privacy and personal freedoms still trump the government's desire to have it easy.
At this point it is impossible to know whether any similar services have been compromised in the way the FBI has attempted with Lavabit. I applaud the principled stance Levison is taking against this intrusion, and hope that, should I ever be in a similar position, I would have the strength to endure the long fight necessary to see it through.
Wednesday, July 3, 2013
Using Subversion With the Kobold2D Game Engine and Xcode
I've been messing about with some basic MacOS and iOS game development lately, and at the moment I'm working with the Kobold2D game engine, which is (mostly) a refinement of cocos2d. I've found however that in Kobold's quest to make initial setup of a project easier, it sidesteps some of the normal setup that Xcode does when you add a project or file. Some of this, such as Project Summary info like the Application Category and Bundle Identifier is easily fixed after the fact. Version control setup, on the other hand, is marginally more complicated than normal (at least with Subversion).
With a bit of trial and error I think I've got a working procedure to get a new Kobold project to play nicely with Subversion. Here are my assumptions for these instructions; the more you deviate from these the less this will be relevant, and I'll leave variations as an exercise for the reader:
With a bit of trial and error I think I've got a working procedure to get a new Kobold project to play nicely with Subversion. Here are my assumptions for these instructions; the more you deviate from these the less this will be relevant, and I'll leave variations as an exercise for the reader:
- You're running Xcode 4.6 (I'm testing with 4.6.3)
- You've got Kobold2D 2.1.0
- You already have a repository set up and waiting at version 0 (zero)
- We're creating a pong clone called -- oddly enough -- "pong"
Create a Kobold2D Project
Run the Kobold2d Project Starter app. Select the appropriate template (I'm going with Physics-Box2D) and set the project name to 'pong'. You can also set your own Workspace name here if you want. Make sure you uncheck "Auto-Open Workspace" because we don't want to have that open quite yet. Click on the "Create Project from Template" button.
Import the Project into Subversion
In Terminal, set ~/Kobold2D/Kobold2D-2.1.0 as your current directory
cd ~/Kobold2D/Kobold2D-2.1.0Make a new directory structure with the usual 'trunk', 'branches', 'tags' directory structure in it
mkdir -p pong-import/{trunk,branches,tags}Move your new 'pong' project into the new trunk directory
mv pong pong-import/trunk/Change directory into pong-import and import the project and directory structure into your repository
cd pong-import; svn import . https://svn.mydomain.com/pong/ -m "Initial import"Now delete this directory structure
cd ..; rm -Rf pong-importThat's it for the Terminal.
Add The Repository to Xcode
This is the only step that's exactly as it would usually be. Go to the Xcode Organizer (menu Window -> Organizer) and select the Repositories tab. Click on the + in the bottom left corner of the window and select Add Repository. Follow the prompts to name the repository, give it the URI to the repository, add your authentication credentials, etc.. For the purposes of the example, let's say the URI for your repository is "https://svn.mydomain.com/pong/".
Check Out a Working Copy
While still in the Xcode Organizer Repositories tab, click on the expander arrow to the left of your 'pong' repository. It should show four folders: 'Root' in purple, and your 'Trunk', 'Branches' and 'Tags' directories in yellow. Select 'Root' and then click on "Checkout" in the button bar across the bottom of the Organizer.
This will open a standard Save dialogue. Browse your way to ~/Kobold2D/Kobold2D-2.1.0/, type 'pong' into the Save As field, and click on Checkout.
Clean Up Your Workspace
Return to your Kobold-2.1.0 folder in the Finder. Open the "Kobold2D.xcworkspace" workspace, or your custom workspace if you created one.
You'll see your pong project listed, but it'll be in red. That's because the files aren't where the automatically-created workspace expects to find them. Right click on that and select Delete.
Then, right-click again and select Add Files to "Kobold2D" (or whatever the name of your workspace is). Browse to ~/Kobold2D/Kobold2D-2.1.0/pong/trunk/pong, select 'pong.xcodeproj' and click on Add.
You're Done!
You should now have a functioning Kobold2D project with all of the usual Xcode internal Subversion support available. You should be able to pick a random file from your 'pong' project files, right click it and go to Source Control -> Update Selected Files and cause Xcode to check if there are updates available for that file.
Good luck, and good gaming.
Thursday, May 16, 2013
Patronage in the Modern Era
Jack Conte, probably best known for popularizing the VideoSong music format with his catchy, clever songs, has launched a new service that might change the way artists of all kinds bring home the bacon.
For years now, the issue of easily copied and distributed data has been plaguing artists and other copyright holders. The arrival data and media sharing systems like BitTorrent and YouTube have been alternately heralded as the death of the music industry as we know it, and as field-levelling tools that would allow new artists of all kinds to connect with their fans.
Either way, many people in film and music have been struggling with the problem of creating new funding models that don't rely on every fan paying a fixed fee for a CD or DVD, and that allow for fans to freely share media (because they're doing that anyway) while still letting the artists pay the rent.
I've often thought one potential solution, however amusing it may sound, is to return to the centuries old practice of patronage. In Medieval and Renaissance Europe, and earlier in Japan and other Southeast Asian countries, it was common for a wealthy individual to support an artist (or two) allowing them to produce plays, music, books, poetry, or paintings that wouldn't otherwise generate an income for the artist. The model worked because artists could create art for art's sake without having to worry about whether it could be easily sold, the the patron received recognition for supporting a vital part of society.
Conte seems to agree that this could work again, and has built a service to make it possible. Patreon allows fans to pledge an amount of money they choose, to be paid to their favourite artists every time the artist produces a piece of content. It's crowd-sourced patronage that Conte likens to an ongoing Kickstarter for smaller projects, and several artists are already using it to get funding that would have been difficult or impossible to get before.
For years now, the issue of easily copied and distributed data has been plaguing artists and other copyright holders. The arrival data and media sharing systems like BitTorrent and YouTube have been alternately heralded as the death of the music industry as we know it, and as field-levelling tools that would allow new artists of all kinds to connect with their fans.
Either way, many people in film and music have been struggling with the problem of creating new funding models that don't rely on every fan paying a fixed fee for a CD or DVD, and that allow for fans to freely share media (because they're doing that anyway) while still letting the artists pay the rent.
I've often thought one potential solution, however amusing it may sound, is to return to the centuries old practice of patronage. In Medieval and Renaissance Europe, and earlier in Japan and other Southeast Asian countries, it was common for a wealthy individual to support an artist (or two) allowing them to produce plays, music, books, poetry, or paintings that wouldn't otherwise generate an income for the artist. The model worked because artists could create art for art's sake without having to worry about whether it could be easily sold, the the patron received recognition for supporting a vital part of society.
Conte seems to agree that this could work again, and has built a service to make it possible. Patreon allows fans to pledge an amount of money they choose, to be paid to their favourite artists every time the artist produces a piece of content. It's crowd-sourced patronage that Conte likens to an ongoing Kickstarter for smaller projects, and several artists are already using it to get funding that would have been difficult or impossible to get before.
Thursday, July 19, 2012
Big Pretty Sky Sparks
A long long time ago, in a public school not too far from where I live now, what little we know about how lightning works was explained to me. Apparently we still don't know a lot about how it works, but it seems we're a lot better at observing it than we used to be: I never actually got to see this particular behaviour of lightning in action before today. My brother sent me a link to this video this morning.. it's a brilliant high-speed capture of a negative stepped ladder coming down from the clouds. One branch makes contact with the ground and creates the path for a major return stroke. This 33 second video covers about 0.13 seconds.
Friday, September 9, 2011
The One Where I Talk About A BBS Game
20 years ago I was, along with many of my friends, spending quite a lot of time on computer Bulletin Board Systems (BBSs). Most of us had already been doing this for many years, and there were people out there who'd been doing it even longer. The BBS scene at the time was pretty sophisticated we thought.. it was becoming possible to do some really great things!
One of the things that I thought was really great was playing computer games against other people in different places. This idea was still pretty novel, as computer networking, the way we think of it today, simply wasn't possible with most home computers – what few even existed. Most BBSes only had a single phone line for people to connect, and so out of necessity virtually every BBS game was turn-based, usually allowing a single turn per day. So, every day, I had time set aside to dial in, see what had transpired since the previous day, and take my turns.
One of my favourite games, and one of the few that I remember in any detail, was Esterian Conquest. It was a multi-player take on some of the early empire-building 4X games, set in a small two-dimensional galaxy, where each player had to build a fleet of ships, and go forth and conquer by force or diplomacy. Don't let the simple idea fool you though.. EC was a beast of a game, with simple rules that allowed for a plethora of complex results. Early on, my nightly turn would take but a few minutes to think about and execute, but later in the game I could literally spend hours pouring over reports from my fleets, hand-drawing maps on graph paper based on the information they contained, and then planning out and tediously punching in new orders for all of my fleets and planets.
About four years ago, while cleaning out boxes that had been in storage for ages, I came across a folder containing papers from the last game of EC I ever played. There were printouts of reports covered in pencil notes about possible actions to take, maps with quick calculations of how long it would take my fleets to reach some hot-spot in the game galaxy, and sheet after sheet of new orders.
Fleet 66 join fleet 47Fleet 32 reduce speed to 5Fleet 73 move to star at (12,41)
Everything about the game came back, and I started to wonder if it could somehow be resurrected. I had heard years before that the source code to EC had been lost in an all-too-unfortunate hard drive crash, but digging around in more boxes I did manage to find a floppy disk with the copy I had for the BBS I'd briefly run myself. Sadly, it proved to be more work than I had time for to get a computer running that could both run modern networking and connect that to an old DOS game. So I decided that instead, I'd just write my own.
I spent the next few months mapping out the game I'd like to create.. what I thought at the time was probably the first ever Turn-based Strategy MMO. I started writing documentation: how would I like the game to work? After chatting about the idea with a friend of mine, he gave me a photo-copy of an old table-top game he'd played called Stonova for ideas (it was based on Chris Wilkes' "Nova"). I worked out plans; I taught myself the math I'd need for three dimensional navigation (I wanted my game to take place in a realistic three-dimensional galaxy). But, when I really got down to it the game I had in mind would have required programming skills, particularly in the area of graphics, that I just didn't have the time to acquire. The idea was grand, but it was beyond me at the time. So I put the idea away for a while.
A couple of days ago, for no particular reason I can recall, I started thinking about this again. My original idea had been too grand for my meagre programming skills. But what if I scaled it down? In the last few years it's been proven that web-based games can work, and do attract players. So what if I ditched the desktop game idea, and went with the much easier to program web-based game? Games like Travian certainly seem to attract players, and as the basic concepts go it isn't all that different from what I had in mind.
My game will be simpler than EC in places, and more involved in others.
In EC it was possible to send your ships to any point in the galaxy, and along the way they would send back reports if they came within sensor range of any other passing ship. You could interrupt their orders mid-trip and have them pursue whom they spotted, or run away, or slow down and quietly follow at the edge of sensor range. I think I will simplify that a lot, and very likely only allow travel to other stars, not the spaces between them. Fleets will report on other fleets they find in their current star system, but I think I will drop the requirement to calculate intersecting flight paths, and handle changes in destination mid-flight.
EC had a small number of fixed ship types that you could build, and assemble into fleets. I think I'd like to have a bit more range in this area, so I'm going to design a technology research system that will allow players to concentrate on improving certain aspects of their ships. Are you a fan of big weapons? What happens when you go up against your opponent who has put all their research into heavily armoured ships? Or, maybe you just want to build really fast ships that can run away easily when threatened.
EC had no system of trade that I can recall. My game will allow players to trade resources, and might even have some sort of in-game cash economy. Perhaps you won't build warships at all, but will instead build big, fast transport ships and survive by supplying everyone with what they need... and paying tribute for "protection" where necessary.
So, I've started working on the idea again. I have no idea what will come of it, or whether I'll even finish. I haven't even got a name for it yet.. but I'm curious to see what I can come up with.
Tuesday, August 2, 2011
Wherein I Keep My Stuff Dry in a Downpour
Last week I rode my bike from Toronto to Québec City and back for the 81st IETF meeting. This is only the second long ride I've done (the first was to Ottawa in May), and the first where I didn't have complete control over which days I'd be on the road – and thus, no control over what weather I'd be riding in. Seeing as it was a work trip, I'd have to carry my laptop, and so some means of keeping it dry would be necessary.
Since a laptop won't fit in my wee Ogio saddle bags, and neither they nor my laptop backpack are waterproof (and I didn't want to wear a backpack for 900km anyway) I needed something I could strap to my bike that would fit a long narrow piece of electronics, and keep it dry.
My usual stop for such things is my local MEC, as they rarely disappoint. This visit was successful as always, and I walked out with a 75 litre Seal Line zip dry bag. At first glance in the store, and while packing, it seemed to be the ideal bag for what I wanted. It's flat and wide, carries easily, holds a week of clothes plus my laptop, laptop bag, and some assorted cables and other gear, and most importantly zips air tight. In fact, after strapping it to my bike I found I had to unzip it to let it deflate a bit.. this made the difference between it poking me in the back all the time and compressing neatly out of my way up on the passenger seat. But, it hadn't really been tested yet... and it would be tested. Oh, how it would be tested.
On the ride home this past Friday, on the leg between Ottawa and Toronto, I ran into a pretty nasty rain storm. Rain wasn't entirely unexpected.. I'd been watching some weather move East toward me from Toronto for a couple days.. but the amount of rain was a huge surprise. I haven't even been outside in a rain storm like this in a long time, let alone out on the highway. As I was passing North of Kingston on Highway 7, Kingston was busy closing down several streets due to flooding. It was some nasty rain.
But lo, and behold, upon my arrival home I found the inside of the dry bag to be.. well.. dry. Bone dry. Where the Ogio bags and me were both soaked, and even my supposedly rain-proof tank bag had some moisture in it, my laptop was saved. Success!
Now if only I could solve the problem of drying out the inside of my helmet in the middle of a downpour.
Since a laptop won't fit in my wee Ogio saddle bags, and neither they nor my laptop backpack are waterproof (and I didn't want to wear a backpack for 900km anyway) I needed something I could strap to my bike that would fit a long narrow piece of electronics, and keep it dry.
 |
| Rain gear, water, and street boots in the saddle bags, spare gloves, camera, maps, etc. in the tank bag, everything else in the Seal Line |
On the ride home this past Friday, on the leg between Ottawa and Toronto, I ran into a pretty nasty rain storm. Rain wasn't entirely unexpected.. I'd been watching some weather move East toward me from Toronto for a couple days.. but the amount of rain was a huge surprise. I haven't even been outside in a rain storm like this in a long time, let alone out on the highway. As I was passing North of Kingston on Highway 7, Kingston was busy closing down several streets due to flooding. It was some nasty rain.
But lo, and behold, upon my arrival home I found the inside of the dry bag to be.. well.. dry. Bone dry. Where the Ogio bags and me were both soaked, and even my supposedly rain-proof tank bag had some moisture in it, my laptop was saved. Success!
Now if only I could solve the problem of drying out the inside of my helmet in the middle of a downpour.
Thursday, January 20, 2011
Screencasting for OSX
I spent some time this afternoon evaluating several screen casting apps for my Mac. It cost me a bunch of time, and a little bit of money, so I thought I'd share my notes to potentially save someone some grief in the future.
For those who haven't seen the term before, "screen casting" is recording video of all or part of a computer display, usually with some sort of voice over, for the purpose of doing a demonstration to be viewed at a later date. It's often done to demonstrate the use, or features, of a piece of software, but lately it's also gaining popularity for sharing things like gaming experiences on video sharing sites like Youtube and Vimeo.
There appear to be all sorts of applications for doing this today, where there were only one or two a couple of years ago, and they have a fairly wide range in features and quality. Some of the applications I looked at also do "screen grab" (capturing a still image of the display) but I pretty much ignored this in all of them since MacOS comes with a perfectly good utility for this (Grab.app). Full reviews below the cut.
For those who haven't seen the term before, "screen casting" is recording video of all or part of a computer display, usually with some sort of voice over, for the purpose of doing a demonstration to be viewed at a later date. It's often done to demonstrate the use, or features, of a piece of software, but lately it's also gaining popularity for sharing things like gaming experiences on video sharing sites like Youtube and Vimeo.
There appear to be all sorts of applications for doing this today, where there were only one or two a couple of years ago, and they have a fairly wide range in features and quality. Some of the applications I looked at also do "screen grab" (capturing a still image of the display) but I pretty much ignored this in all of them since MacOS comes with a perfectly good utility for this (Grab.app). Full reviews below the cut.
Tuesday, November 30, 2010
No Mo' Movember
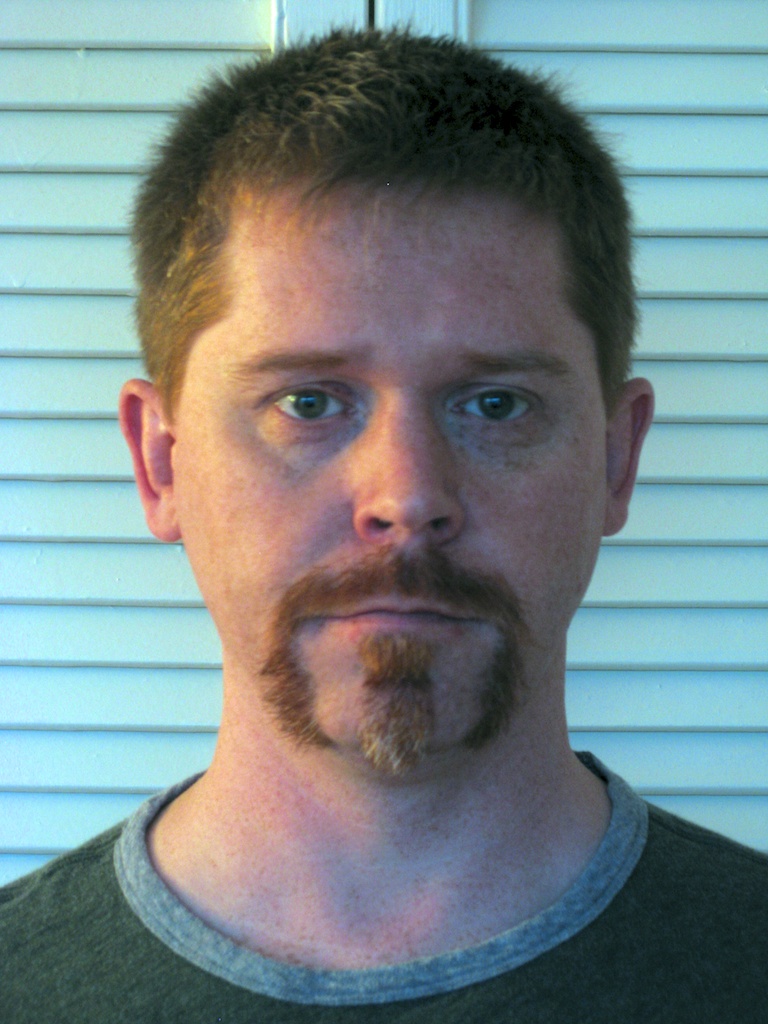
I'd like to thank everyone who's donated so far; I've managed to raise $260 at this point. Donations are still open, if you haven't had a chance to contribute, and I'm pretty sure they will be at least until the end of the week.
Thanks again everyone for helping out! As promised, a time-lapse movie of the mo growth is forthcoming, but it's a bit of work to get the photos all lined up right, so it may take me a few days to get it out. I'll be sure to post it here when it's done.
Cheers!
Thursday, November 11, 2010
Movember Update: Day 11
 |
| Movember Mugshot, Day 11 |
I'd like to say a big thanks to all the people who have donated so far! I really appreciate your contribution! For anyone who would like to donate to prostate cancer research, but hasn't had a chance yet, please drop by my personal Movember page; your help will be greatly appreciated!
Escaping Mac Mail RSS
Don't get me wrong, the Mac Mail RSS reader is pretty good. If you've just got the one computer, and don't have any desire to read your RSS feeds when you're away from home, then it's an excellent choice. It's shameful, however, that MobileMe – Apple's service for syncing your data between Mac computers – doesn't even try to sync your RSS feeds between Mail clients.
This lack of ability to keep the RSS feeds in my Mail client on my desktop and my laptop in sync (let alone on my iPad or iPhone) has led me to start looking for a replacement RSS reader. As disappointing as the lack of sync is, I quickly discovered the even more shocking reality that there's not even a way to export my RSS feeds from Mail. Go, look ... you won't find anything... I'll wait.
As it happens, there's this standard, which is useful for moving RSS feed information around, called OPML (Outline Processor Markup Language), which is a subset of XML (eXtensible Markup Language). I'm not a big fan of XML but there are times when it's useful, and in this case several major RSS readers have implemented an OPML import/export so that you can move your RSS feeds around. It would be really handy if Apple implemented this as well.
Unfortunately, Apple's oversights get worse. Not only can you not sync RSS feeds between computers, or export your RSS feeds, you can't even view the URL of your RSS feeds within Mail so that you could manually copy them to another device or program. Go Apple!
This only leaves one option: manually digging through the files that Mail saves out to keep track of your feeds. This is a task that is beyond the average home computer user, which effectively means that most Mac users who start using Mac Mail as their RSS reader are stuck.
Fortunately, I'm not the average home computer user, and I know where to find these files that Apple writes, and I know how to read them .. so I could go in and cut and paste all those URLs into another reader. But I'm too lazy for that, so I wrote a program to do it for me. This wasn't quite as easy as I expected, since reading in the XML plist files turned out to be a bit of a trick. As much as I don't like XML, trying to describe how I hate XML plist (the format Mail uses for these files) would completely derail this post – Apple really screwed the pooch on that one.
Eventually I gave up on the program being super-portable, and just used someone else's library to read in the plist files. I had been hoping that I could post a script here that anyone could save on their Mac and run to generate an OPML file, but the plist debacle meant that other stuff would need to be installed. Oh well.
In the end I got my OPML file, and I've imported it into Google Reader. Several of the iPad RSS readers will import their feeds from Google, which works well enough.
I'm posting my script below, free to anyone for personal use. In order to make it work you'll need to first install two libraries on your system.
Making it Go
In "Terminal" (which you can find in Applications -> Utilities), type the following two commands:
Once you've installed builder and plist, click on this link. It will download an archive file that contains the script. When that's done, in your Downloads window double-click on the "MacRSStoOPML.tar.gz" entry; that will decompress the archive and show you a new Finder window with the archive you downloaded and the script that was in it. Double-click on "MacRSStoOPML" (it'll have a grey box-like icon) to run it. And you're done! You should now have a file called "opml.xml" on your Desktop, which lists all of the RSS feeds you were reading in Mail.
Happy reading!
This lack of ability to keep the RSS feeds in my Mail client on my desktop and my laptop in sync (let alone on my iPad or iPhone) has led me to start looking for a replacement RSS reader. As disappointing as the lack of sync is, I quickly discovered the even more shocking reality that there's not even a way to export my RSS feeds from Mail. Go, look ... you won't find anything... I'll wait.
As it happens, there's this standard, which is useful for moving RSS feed information around, called OPML (Outline Processor Markup Language), which is a subset of XML (eXtensible Markup Language). I'm not a big fan of XML but there are times when it's useful, and in this case several major RSS readers have implemented an OPML import/export so that you can move your RSS feeds around. It would be really handy if Apple implemented this as well.
Unfortunately, Apple's oversights get worse. Not only can you not sync RSS feeds between computers, or export your RSS feeds, you can't even view the URL of your RSS feeds within Mail so that you could manually copy them to another device or program. Go Apple!
This only leaves one option: manually digging through the files that Mail saves out to keep track of your feeds. This is a task that is beyond the average home computer user, which effectively means that most Mac users who start using Mac Mail as their RSS reader are stuck.
Fortunately, I'm not the average home computer user, and I know where to find these files that Apple writes, and I know how to read them .. so I could go in and cut and paste all those URLs into another reader. But I'm too lazy for that, so I wrote a program to do it for me. This wasn't quite as easy as I expected, since reading in the XML plist files turned out to be a bit of a trick. As much as I don't like XML, trying to describe how I hate XML plist (the format Mail uses for these files) would completely derail this post – Apple really screwed the pooch on that one.
Eventually I gave up on the program being super-portable, and just used someone else's library to read in the plist files. I had been hoping that I could post a script here that anyone could save on their Mac and run to generate an OPML file, but the plist debacle meant that other stuff would need to be installed. Oh well.
In the end I got my OPML file, and I've imported it into Google Reader. Several of the iPad RSS readers will import their feeds from Google, which works well enough.
I'm posting my script below, free to anyone for personal use. In order to make it work you'll need to first install two libraries on your system.
Making it Go
In "Terminal" (which you can find in Applications -> Utilities), type the following two commands:
gem install builder
gem install plist
Once you've installed builder and plist, click on this link. It will download an archive file that contains the script. When that's done, in your Downloads window double-click on the "MacRSStoOPML.tar.gz" entry; that will decompress the archive and show you a new Finder window with the archive you downloaded and the script that was in it. Double-click on "MacRSStoOPML" (it'll have a grey box-like icon) to run it. And you're done! You should now have a file called "opml.xml" on your Desktop, which lists all of the RSS feeds you were reading in Mail.
Happy reading!
Wednesday, November 3, 2010
Mo Fruits, Mo Flowers, Mo Leaves, Mo Birds - Movember.
That's right, it's Movember again!
For those that don't know, the month formerly known as November has been given over to the goal of raising awareness of prostate cancer, accomplished by men the world over making a commitment to grow new moustaches (a "Mo"). Much like the commitment to run or walk for charity, men commit to growing a moustache for 30 days to raise funds for cancer research. Last year, global participation in Movember raised CDN $47 million!
I'm taking part for the first time this year, and a couple of mornings ago I got myself a nice clean shave. I'm now waiting for enough to grow in to start trying to decide what sort of mo I'll grow!
Hopefully, a few of you will decide to support my face fuzz with a donation, which you can easily do here. In return I'll commit to new growth on my face, and to regularly posting updates here and on my Movember page, which I'm sure will generate much controversy and hilarity.
The Movember movement aims to increase awareness of prostate cancer and to promote screening (testing before detection of any symptoms), for obvious reasons. Unfortunately, here in Ontario not all men have equal access to the PSA test (Prostate-Specific Antigen test). The Ontario Ministry of Health has chosen not to provide the PSA test as an early detection measure as they have with cervical and breast cancer screening. The Ministry web site says it best:
Perhaps some enterprising souls will write to the Minister and encourage her to support prostate cancer screening.
In the mean time, please visit my Movember page; enjoy a few laughs at my expense, and please donate if you can.
For those that don't know, the month formerly known as November has been given over to the goal of raising awareness of prostate cancer, accomplished by men the world over making a commitment to grow new moustaches (a "Mo"). Much like the commitment to run or walk for charity, men commit to growing a moustache for 30 days to raise funds for cancer research. Last year, global participation in Movember raised CDN $47 million!
I'm taking part for the first time this year, and a couple of mornings ago I got myself a nice clean shave. I'm now waiting for enough to grow in to start trying to decide what sort of mo I'll grow!
Hopefully, a few of you will decide to support my face fuzz with a donation, which you can easily do here. In return I'll commit to new growth on my face, and to regularly posting updates here and on my Movember page, which I'm sure will generate much controversy and hilarity.
The Movember movement aims to increase awareness of prostate cancer and to promote screening (testing before detection of any symptoms), for obvious reasons. Unfortunately, here in Ontario not all men have equal access to the PSA test (Prostate-Specific Antigen test). The Ontario Ministry of Health has chosen not to provide the PSA test as an early detection measure as they have with cervical and breast cancer screening. The Ministry web site says it best:
In men without symptoms (screening), PSA testing is not paid for by the provincial health plan. A man can have the PSA test if he is willing to pay for the test himself. However, it is hoped he will make this decision only after discussion with his Health Care Provider.The Ministry's explanation for this is that they don't believe the current PSA test is reliable enough to be used as a screening measure. The statistics they quote say that, of every 100 men over the age of 50 screened, 4 or 5 will have prostate cancer: three will be detected, and one or two will go undetected by the test. That seems like a fairly decent result to me, when one in six men will be diagnosed with prostate cancer in his lifetime, and twelve Canadian men die of prostate cancer daily.
Perhaps some enterprising souls will write to the Minister and encourage her to support prostate cancer screening.
In the mean time, please visit my Movember page; enjoy a few laughs at my expense, and please donate if you can.
Friday, August 6, 2010
Pay-as-you-go iPad Service in the UK
Monday, February 15, 2010
Losing My Memories
Back at the beginning of January a horrible thing happened. It was something that a lot of people fear in this day and age, but which few really believe will happen to them. It happened to me though, and I had to find a way to recover from it. Yes, I lost all of my digital photographs.
The the complete details of how it happened are not terribly germane to the post but the short story is that, while moving to a new computer, for that brief period where a lot of this data existed only on my backup disk, a Windows installer decided it would like to reformat that backup disk for me.
Recovering data from a reformatted drive can be tricky. Without the original filesystem information you need some special tools to even find old files, let alone reassemble them into something recognizable. But, with a bit of work I managed to get all of my images back, and this is the story of how I did that.
The whole recovery story started off with a stroke of luck. I happened to mention the demise of all of my photographs to a friend of mine, and he just happened to know of an incredibly useful tool for recovering my data. He pointed me toward TestDisk by Christophe Grenier. TestDisk is rather badly named I think, because testing is the least of what it can do. One of the key features that made my life far, far easier is its ability to do file type recognition when recovering files.
When the filesystem information from a disk is lost, even if you're able to recover files, you can't always recover the file names; often that information is lost forever. That means that recovered files will typically wind up with some sort of coded file name (usually just a number generated by the recovery program). If you're recovering a very large disk, you can wind up with literally millions of files with completely nondescript file names. It would be completely impractical to try and sort through an entire disk worth of files that way trying to find the pictures.
Fortunately, TestDisk's ability to recognize file types based on the data in the file, rather than the file name, meant that I could tell it to only recover the JPEG images from the disk. This way I wound up with a set of files where I definitely knew the type of each and every file. And it just so happens that all of the digital cameras I've owned work in JPEG.
I knew I was still going to have a problem though. Because this was my backup disk, which contained not only my Aperture database, but also all of my Time Machine data (a MacOS backup tool), what would be recovered in searching for all JPEG images would include all of the pictures in my Aperture database, but also my entire web browser cache, and any other little jpeg images stored on my disk as part of various applications, etc. When the recovery ran, I ended up with a bunch of folders with a little under 35,000 pictures in them. Now what?
Well, the first thing I did was to try to eliminate any duplicate images. Even though that would be a fairly simple script to write, I always google for these sorts of tools before I try to write them myself. Usually, someone else has already written and posted the thing I need, and often it's better than I would have written on the first try. This was just such a case, and I found a great little perl script that would search for and remove all the duplicate images.
That got me down to a little over 20,000 images. Still a lot, but far fewer than I had before.
The next step was to try and separate out the original files downloaded from my cameras from all of the other random images. For that, I did write my own script. I scanned through all of the images to extract the original image date/time from the Exif data, reorganizing the images into directories by the day the picture was taken. If an image had no original date in its Exif data, or no Exif data at all, then I assumed the file was not a photograph (or not one of my photographs) and put it off in a separate directory to be sorted through manually later.
Here's the script I used:
This has left me with about 7,300 images sorted out into directories by the date the picture was taken, and about 13,600 in directories of images with no known shoot date. This is far more manageable! I'll probably still wind up doing a bunch of manual sorting of the images that are left, but now the task is much more approachable than it was in the beginning. It's also possible I could find some other useful piece of Exif data to sort them by.
The the complete details of how it happened are not terribly germane to the post but the short story is that, while moving to a new computer, for that brief period where a lot of this data existed only on my backup disk, a Windows installer decided it would like to reformat that backup disk for me.
Recovering data from a reformatted drive can be tricky. Without the original filesystem information you need some special tools to even find old files, let alone reassemble them into something recognizable. But, with a bit of work I managed to get all of my images back, and this is the story of how I did that.
The whole recovery story started off with a stroke of luck. I happened to mention the demise of all of my photographs to a friend of mine, and he just happened to know of an incredibly useful tool for recovering my data. He pointed me toward TestDisk by Christophe Grenier. TestDisk is rather badly named I think, because testing is the least of what it can do. One of the key features that made my life far, far easier is its ability to do file type recognition when recovering files.
When the filesystem information from a disk is lost, even if you're able to recover files, you can't always recover the file names; often that information is lost forever. That means that recovered files will typically wind up with some sort of coded file name (usually just a number generated by the recovery program). If you're recovering a very large disk, you can wind up with literally millions of files with completely nondescript file names. It would be completely impractical to try and sort through an entire disk worth of files that way trying to find the pictures.
Fortunately, TestDisk's ability to recognize file types based on the data in the file, rather than the file name, meant that I could tell it to only recover the JPEG images from the disk. This way I wound up with a set of files where I definitely knew the type of each and every file. And it just so happens that all of the digital cameras I've owned work in JPEG.
I knew I was still going to have a problem though. Because this was my backup disk, which contained not only my Aperture database, but also all of my Time Machine data (a MacOS backup tool), what would be recovered in searching for all JPEG images would include all of the pictures in my Aperture database, but also my entire web browser cache, and any other little jpeg images stored on my disk as part of various applications, etc. When the recovery ran, I ended up with a bunch of folders with a little under 35,000 pictures in them. Now what?
Well, the first thing I did was to try to eliminate any duplicate images. Even though that would be a fairly simple script to write, I always google for these sorts of tools before I try to write them myself. Usually, someone else has already written and posted the thing I need, and often it's better than I would have written on the first try. This was just such a case, and I found a great little perl script that would search for and remove all the duplicate images.
That got me down to a little over 20,000 images. Still a lot, but far fewer than I had before.
The next step was to try and separate out the original files downloaded from my cameras from all of the other random images. For that, I did write my own script. I scanned through all of the images to extract the original image date/time from the Exif data, reorganizing the images into directories by the day the picture was taken. If an image had no original date in its Exif data, or no Exif data at all, then I assumed the file was not a photograph (or not one of my photographs) and put it off in a separate directory to be sorted through manually later.
Here's the script I used:
#!/usr/bin/perl

use strict;
use diagnostics;
use warnings;

use Date::Parse;
use File::Find;
use Image::ExifTool qw(:Public);
use POSIX qw(strftime);

my( $source_d      ) = '/Users/matt/Desktop/Recovery/jpg/';
my( $base_dest_d   ) = '/Users/matt/Desktop/Recovery/jpg-sorted/';

my( $dir_date_format  ) = '%F';
my( $file_date_format ) = '%Y%m%d-%H%M%S';

my( $nodate_i, $nodate_d ) = (0, 00);

if( ! -d $base_dest_d )           { mkdir $base_dest_d; }
if( ! -d $base_dest_d.'NoDate/' ) { mkdir $base_dest_d.'NoDate/'; }

sub wanted {
    my( $source_file ) = $File::Find::name;
    my( $source_date, $dest_d, $target_f );

    unless( -f $source_file ) { return; }
    unless( $source_file =~ /\.jpg$/ ) { return; }


    my( $info ) = ImageInfo($source_file);
    if( $info->{DateTimeOriginal} ) {
        $source_date = str2time($info->{DateTimeOriginal});

        $dest_d = $base_dest_d .
            strftime($dir_date_format, localtime($source_date));

        $target_f = strftime($file_date_format, localtime($source_date));

        # in addition to naming the file by date, give the image an index
        # number that advances if there is more than one image with the same
        # date+time
        my( $target_i ) = 0;
        while( length($target_i)<2 ) { $target_i = '0'.$target_i; }
        while( -f $dest_d.'/'.$target_f.'-'.$target_i ) {
            $target_i++;
            while( length($target_i)<2 ) { $target_i = '0'.$target_i; }
        }

        $target_f = $target_f.'-'.$target_i;

    } else {
        # images with no date/time get put into subdirs, 100 images per
        # directory to keep the directory from getting too large
        $nodate_i++;
        if( $nodate_i > 100 ) {
            $nodate_i = 1;
            $nodate_d++;
        }
        while( length($nodate_d)<3 ) { $nodate_d = '0'.$nodate_d; }
        $dest_d = $base_dest_d . 'NoDate/' . $nodate_d;

        $target_f = $_;

    }

    if( ! -d $dest_d ) {
        mkdir $dest_d or die "failed to create dest dir $dest_d: $!";
    }

    my( $final_file ) = sprintf( "%s/%s", $dest_d, $target_f );
    printf "%s: %s: %s\n",
        $_, $info->{DateTimeOriginal} || 'NoDate', $final_file;

    link( $_, $final_file ) or die "failed to link files $_:$final_file: $!";
}

find(\&wanted, $source_d );
This has left me with about 7,300 images sorted out into directories by the date the picture was taken, and about 13,600 in directories of images with no known shoot date. This is far more manageable! I'll probably still wind up doing a bunch of manual sorting of the images that are left, but now the task is much more approachable than it was in the beginning. It's also possible I could find some other useful piece of Exif data to sort them by.
Tuesday, February 9, 2010
So Easy, an Adult Can Understand!
The Internet, explained to your mom.
That's how I'd describe this video from EuroIX, an association of European Internet Exchange Points (IXPs). Don't worry if you don't know what an IXP is.. the video explains.
I was all set to blog about this months ago, but then they took the video down in order to update and clarify a few things. It's back up now, and so you get to enjoy its informational goodness.
That's how I'd describe this video from EuroIX, an association of European Internet Exchange Points (IXPs). Don't worry if you don't know what an IXP is.. the video explains.
I was all set to blog about this months ago, but then they took the video down in order to update and clarify a few things. It's back up now, and so you get to enjoy its informational goodness.
Monday, February 8, 2010
Friday, February 5, 2010
Safe Driving in the Home
A creatively conceived and beautifully shot PSA, from the Sussex Safer Roads Partnership in the UK.
Subscribe to:
Posts (Atom)


 Posts
Posts

